Xbox logo
Learn how to create the Xbox logo...
1

This tutorial was actually requested a couple of times so I thought why not?
If you have seen the advert, you will be familiar with this logo.
Be warned, this logo is copyright Microsoft™, so please lets just use this as a learning purpose. Xbox™ and the Xbox™ logo are trademarks or Microsoft™ All rights reserved.
This tutorial is for learning purposes, I accept no responsibility for the way its used.
This tutorial assumes you have some good knowledge of Photoshop.
Now onto the tutorial.
Make a new image, 600x600px with a black background.
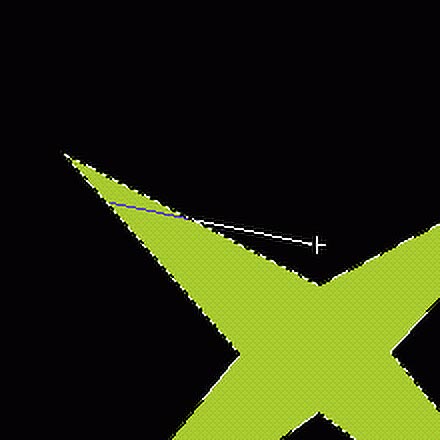
Now you have two choices here, you can sit with your polygon lasso trying to recreate the X, or like me you can get a small image and use the pen to trace it. I thought you might choose my way.
Left is the image I am going to trace, so copy and past it into the center of your canvas.
If you have seen the advert, you will be familiar with this logo.
Be warned, this logo is copyright Microsoft™, so please lets just use this as a learning purpose. Xbox™ and the Xbox™ logo are trademarks or Microsoft™ All rights reserved.
This tutorial is for learning purposes, I accept no responsibility for the way its used.
This tutorial assumes you have some good knowledge of Photoshop.
Now onto the tutorial.
Make a new image, 600x600px with a black background.
Now you have two choices here, you can sit with your polygon lasso trying to recreate the X, or like me you can get a small image and use the pen to trace it. I thought you might choose my way.
Left is the image I am going to trace, so copy and past it into the center of your canvas.
2
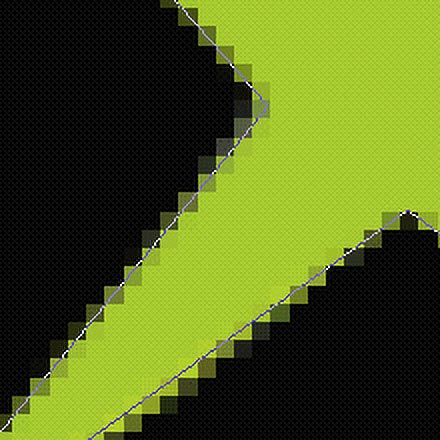
Now zoom, up close to your logo so if fills your screen.
Set your foreground colour to #90CC1C Now select the pen tool.
Make a new layer.
Now it's just a case of selecting the corners of the X, you couldn't have an easier shape to trace, so think yourself lucky.
As you can see I have zoomed right up close to make this a lot easier...
With the path still selected and pen tool still your tool, right click inside the path and choose "Free transform Path" Now hold Shift + Alt and drag one of the corners to enlarge the X to your desired size.
You can now delete the layer with the image on that you used to trace, or you may want to hide it to use a a reference later.
3
Now we are going to make some of the inner shadows of the X, so HOLD CTRL and click on the layer containing the X you just made to select it. Make a new layer. Now, in the toolbar, select the Gradient tool. Match your options to mine shown here: Gradient, foreground color (#48921C) to transparent, radial gradient.
Set your foreground to: #48921C
Click in the center and drag outwards, try to copy my image opposite.
Now simply make a rectangle and delete the left half of the gradient you just make as show here:

As you can see I have deleted the gradient from the left side.
Set your foreground to: #48921C
Click in the center and drag outwards, try to copy my image opposite.
Now simply make a rectangle and delete the left half of the gradient you just make as show here:
As you can see I have deleted the gradient from the left side.
4

Simply repeat the the last step for the left hand side although this time, set your foreground colour to: #6CC327.
Here are the steps roughly again:
Make new layer
Load selection from X
Do gradient on the new layer
Delete the right hand side of the gradient.
It should look something like mine does on the left.
Here are the steps roughly again:
Make new layer
Load selection from X
Do gradient on the new layer
Delete the right hand side of the gradient.
It should look something like mine does on the left.
5

We are now going to do the same for the bottom two spikes.
Again, CTRL click the original layer with the X on it to select it. Create a new layer, now set your foreground to: #4A9520 this time when we use the gradient, we use a linear gradient, here are the options: Gradient, foreground (#4A9520) to transparent, linear gradient.
Start from the top of the bottom left spike and drag about half way. You may want to refer to your image (which you traced earlier) as a guide here. Once done, Deselect (CTRL +D) and use the rectangular marquee to delete the the parts you don't want. (Refer to my image opposite, see if you can get it to look like that) CTRL + D to deselect.
6

Now, click the layer you just created (mine's layer 4) and hold CTRL and Alt to duplicate it. Drag it over to your over spike and go to Edit>Transform>Flip horizontal Then simply line it up in the right Spike.
You might think we are cheating, well yeah we are but I would like to get to bed sometime tonight =).
It's starting to come together, but there's more to do yet.
Create a new layer JUST ABOVE THE LAYER WITH YOUR ORIGINAL GREEN X ON IT.
Now CTRL click on the Layer with the X on it to select it, we are going to use the yellow colour #C2E916 and the airbrush to simply paint some yellow highlights. Again, refer to your image to see where about the highlights go, I am using size 100px and 200px brushes (very soft) for my highlights.
7
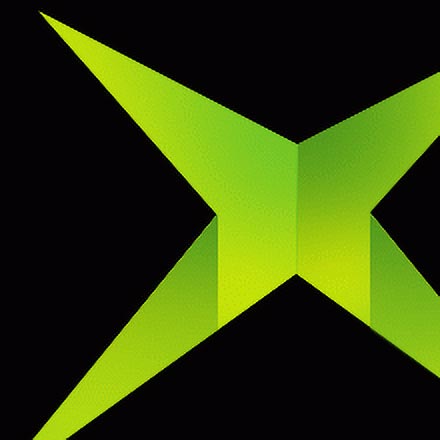
If you managed to follow me up to now I'm impressed, this is getting long isn't it? well, we are nearly done. It should look like mine opposite so far.
Now to make it look like its popping out, see the next step.
Now to make it look like its popping out, see the next step.
8
OK, this can get tricky, so get yourself a coffee and make sure your still wide awake.
HOLD CTRL and click on the original X layer to select it, use the up arrow to move the selection up 5 pixels.
Now HOLD CTRL and ALT and click the same layer again. You will have a small selection. Move it back down 5 pixels, create a new layer on top of all your others and fill it black.
We do not need the black lines on the bottom two spikes so you can delete these. We are just concerned with the top line. Although we can't see the line cause its black, we will need it in a minute so leave it there for now.
Do this again HOLD CTRL and click on the original X layer, move the selection 5 pixels right. HOLD CTRL + ALT and click on that layer again. Move the selection back 5 pixels. Create a new layer on top of the others again and fill in the selection with black.
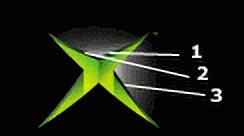
Again, delete parts of the lines we do not need, this image shows the 3 lines we do need:
9

One you have all your lines in place (that is the hard part over).
Scroll down right to the background layer, create a new layer just above the background layer.
Press D then X to reset your colours. Airbrush the highlights as seen in the reference image. This will make your black lines visible (and you may need to make some adjustments to them ;))
This can take a few tries but its fairly simple.
That's it your basically done! That was fun eh?
You may want to merge some of the layers and perhaps add some noise (not a lot!) to it.
Here we are with our finished product.
Please be aware of the copyright issues regarding this logo.
Hope you enjoyed this tutorial =)
This tutorial was brought to you by Robouk, please post any questions in the forum. Thank you.