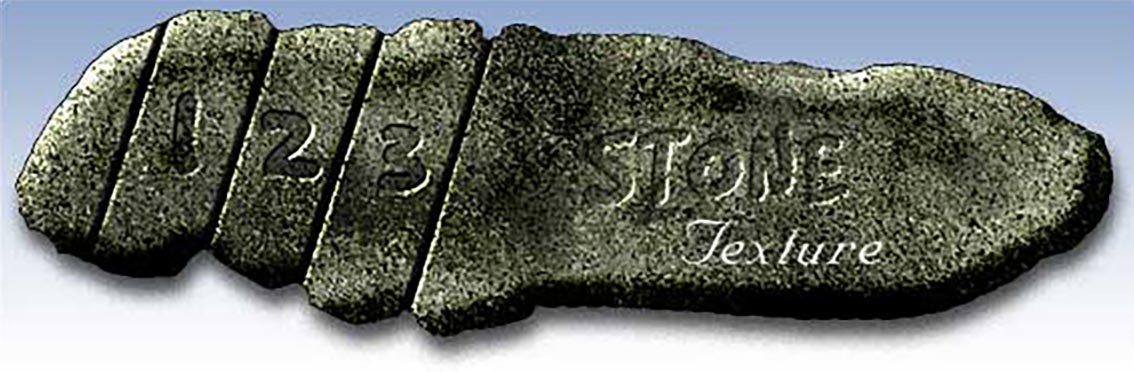
Stone texture
Learn how to make a stone shaped interface...
The techniques I have described are adaptable; you can use these to create a whole variety of different textures and effects. Just change some of the settings and experiment.
If your a beginner the tutorial introduces layer effects, a layer mask, and a clipping group. This time I'm going to go through each step in detail so you can achieve exactly the same effect.
1
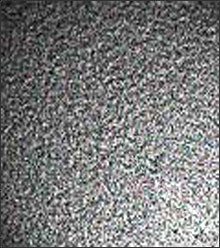
Start with a new RGB file 300 by 500 pixels. White background.
First we will create our "stone" texture on a new layer. Make a new layer -Fill with 50% grey. Apply gaussian noise, monochromatic, 18. Run Lighting Effects with any of the RGB channels as the texture channel, (its not too important that your settings are exactly the same). This is just to create a "natural" base which we are going to destroy in the next step!
2
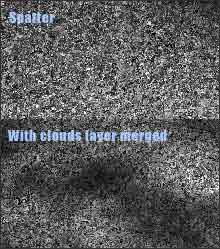
Now use the brush strokes - Spatter filter with the default settings-Radius 10 smoothness 5.
Make a new layer and fill it with 50% grey again. Reset the colors press D. Run the clouds filter then apply auto levels to the clouds. Set this layer to Multiply 75% and merge it with the stone layer below (control E). This will have created a kind of random variation over the surface.
Because there are a lot of random factors introduced with running some of the "gallery effects" filters you may want to run them again a few times or tweak them to suit you.
3
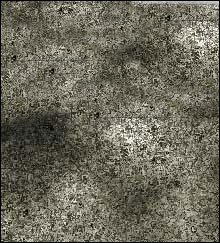
Now apply Levels (control L) with the settings indicated left- the main adjustment here is in the midtones. Adjust the Hue/saturation (control U) using the colorise checkbox and use these settings: hue 70, saturation 10, and brightness 0. You should be left with something similar to the detail on the left.
Apply a bevel and emboss layer effect (Set to Inner bevel "smooth", depth 421, size 27, soften 12. Use Color Dodge (opacity 63) as the highlight mode and Color Burn (opacity 44 or higher if you like) for the shadow. If you're using version 5 then you can still create a similar effect.
Apply a bevel and emboss layer effect (Set to Inner bevel "smooth", depth 421, size 27, soften 12. Use Color Dodge (opacity 63) as the highlight mode and Color Burn (opacity 44 or higher if you like) for the shadow. If you're using version 5 then you can still create a similar effect.
4
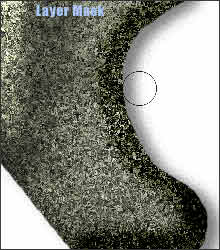
Now we are going to carve our stone into some kind of shape. Take your chisel ... actually you don't need a chisel. What you do is add a layer mask to the "stone layer" by option clicking the layer mask icon This will completely mask the layer.
Choose the paintbrush tool with a hard edged brush at 100% opacity draw white into the layer mask. Make sure the MASK is highlighted in the layers palette while you do this. You can create any shape you want in this way! Switch from white to black using the X key to paint your shape in and out. This is the power of layer masks - your shape will always be editable.
Give the stone layer a drop shadow opacity 50, distance 13, spread 0, size 13 and noise 10%.
5
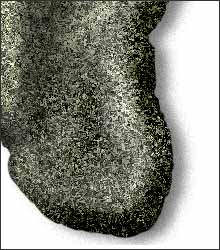
Next we will create a new layer underneath the stone layer which will provide a solid black base. Load the stone shape as a selection (by control clicking the layer mask) and fill the selection on the new layer with black.
Now go back to the stone layer. Paint into the layer mask again this time with black using a soft edged 10% opacity brush. This will make some soft indentations in the stone and should help make the bevel look less artificial.
Now go back to the stone layer. Paint into the layer mask again this time with black using a soft edged 10% opacity brush. This will make some soft indentations in the stone and should help make the bevel look less artificial.
6
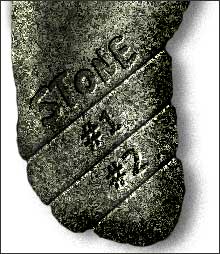
Now for the last step we are going to create some ridges - these can be used for interface buttons or whatever you want.
Create a new layer on the top and use the line tool to make some black lines going across the surface (2 pixels wide). Now add another bevel and emboss (outer bevel, smooth, depth 100, direction down, size 5, soften 0) use Color Dodge again for the highlights and Multiply for the shadows. You might want to adjust the direction of the light slightly here - just uncheck the "global light" box and fiddle with direction pointer!
Now go to the layers palette and option click the narrow line between the stone layer and the line layer. This creates a clipping group which will restrict your bevelled lines to the contours of your stone shape.
I've added some text here too - but that's up to you!
This tutorial was by [email protected], brought to you by Robouk, please post any questions in the forum. Thank you.