Snow capped text
Create this cool snow capped text with a frosty appearance *brrr*...
1

A common symbol of christmas is the ole snow capped text. You will need some text ready for this tutorial, in this example I'm using some large AQA Smooth blue text that you can create using the tutorial here.
I have also added a blue/white gradient to my background layer, this makes things look cold and will make the snow show up more.
Make sure your image canvas is rather large, I would suggest around 700x700px.
For this tutorial make your text large, I have done size 230pts and font Times new roman.
Once you have your text ready, lets begin...
2

Firstly, HOLD CTRL and click on the layer with your text on it to select the text.
Press D then X to reset your colours.
Now HOLDING shift press UP on the keyboard once to move the text selection up 10 pixels.
Now, HOLD CTRL and ALT and click on the text layer again. What this does is leaves you with a small selection at the top of your text, this is where are snow will go.
HOLD SHIFT and press the DOWN arrow on the keyboard once to move the selection back down so it covers the text.
Create a new layer above the text layer and fill the selection in WHITE.
It should look like mine opposite.
Press CTRL + D to deselect.
3

With the snow layer the active one, go to Filter>Stylize>Diffuse Dot "normal" and click ok.
It looks a little more like snow now right?.
Next go to Edit>Transform>Rotate 90 CW
to rotate the snow 90 degrees clockwise.
Now go to Filter>Stylize>wind
Dot "wind" and "from the left" and click ok.
Now go to Edit>Transform>Rotate 90 CCW
This will rotate the snow counter clockwise so its back sitting on top of your text.
4
Now, if your happy with it as it is, you can call it finished, the next steps are optional.
Give the snow some depth by adding an inner shadow to the SNOW layer. Layer>Layer effect>Inner shadow: Blend mode multiply, colour 8FD3EC, opacity 50, angle 120, distance 5, choke 8, size 4.
Give the snow some depth by adding an inner shadow to the SNOW layer. Layer>Layer effect>Inner shadow: Blend mode multiply, colour 8FD3EC, opacity 50, angle 120, distance 5, choke 8, size 4.
5

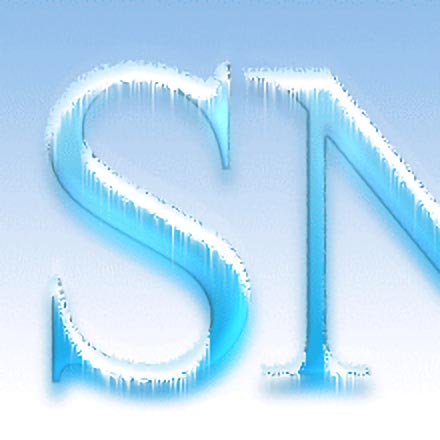
Add a little frost.
To add a little ice/frost to your text do the following.
HOLD CTRL and click on the TEXT layer to select the text. Create a new layer above the text but below the snow.
Fill this selection in with white, and press CTRL + D to deselect.
Set the Layer blending mode of this layer to OVERLAY and lower the "fill opacity" to around 60%.
This gives your text a nice kinda frosty glow. =)
Hope you enjoyed the tutorial, post any outstanding results in the Forum.
This tutorial was brought to you by Robouk, please post any questions in the forum. Thank you.