Smooth metal
Coat your interface panels in this smooth metal look that is easy to re-apply over and over...
1

Ever since I made the LCD orb tutorial people have been asking about the ring I added around it in the final example, and also asking how to make the metallic outside. If you have no idea what I'm talking about see the last step of the tutorial.
Firstly, Create a new image big enough for your interface you want to apply this to, about 600x600 pixels.
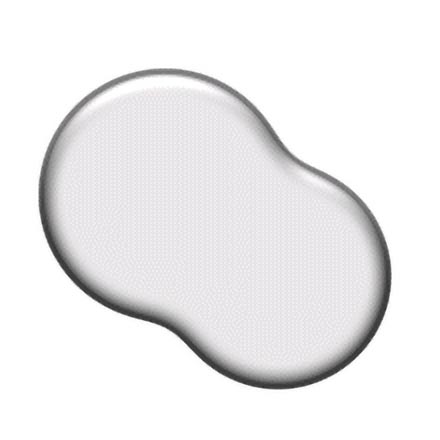
Now, the next step is to create the shape of your interface, I'm keeping mine simple, its just 2 circles blended together. Once you have your shape, fill it with this greyish colour: #E6E6E6.
Keep your shape on its own layer and make sure you have nothing selected (CTRl + D).
Firstly, Create a new image big enough for your interface you want to apply this to, about 600x600 pixels.
Now, the next step is to create the shape of your interface, I'm keeping mine simple, its just 2 circles blended together. Once you have your shape, fill it with this greyish colour: #E6E6E6.
Keep your shape on its own layer and make sure you have nothing selected (CTRl + D).
2
Now, the tip is to try and create as much of the effect using Layer styles, why? well this was next time you want to apply this metal effect to a shape its much easier and quicker to recreate since you can save your layer style.
On with the tutorial: With your shapes layer selected, go to Layer>Layer Styles>Inner Glow
Match it up with these settings: Blend mode normal, opacity 75, noise 0, colour black, technique softer, source edge, choke 16, size 13.
This gives our shape its first hint of a bevel.
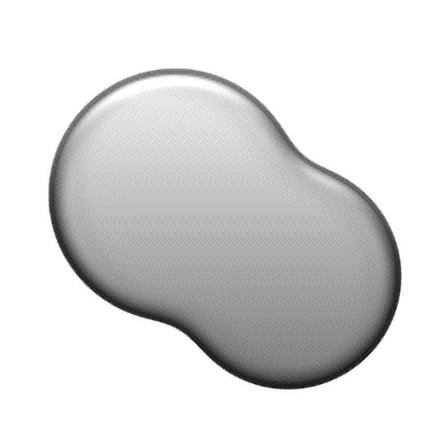
Next up, add an inner shadow and match these settings: Blend mode colour dodge, colour white, opacity 53, angle 97, noise 0, distance 8, choke 0, size 5.
Ok this has added the bright highlight (our source of light if you like) Right now it should look something like what I have opposite.
If so, move on.
On with the tutorial: With your shapes layer selected, go to Layer>Layer Styles>Inner Glow
Match it up with these settings: Blend mode normal, opacity 75, noise 0, colour black, technique softer, source edge, choke 16, size 13.
This gives our shape its first hint of a bevel.
Next up, add an inner shadow and match these settings: Blend mode colour dodge, colour white, opacity 53, angle 97, noise 0, distance 8, choke 0, size 5.
Ok this has added the bright highlight (our source of light if you like) Right now it should look something like what I have opposite.
If so, move on.
3
Its coming along, but we are not done with layer styles yet.
Add a gradient overlay style to it and math these settings: Blend mode normal, opacity 57, colour- gradient (black-white), angle 97, style linear, angle 90, scale 150.
Next up on the styles is Satin add a satin style and match these settings: Blend mode colour dodge, colour white, opacity 5, angle 19, distance 11, size 14, contour invert (lumpy).
Now, you are more or less done, I also added a drop shadow to mine too but that part is optional.
Do NOT click OK yet.
Click at the top where it says "styles" Now click the "New style" button and give your style a name such as "smooth metal".
This saves you having to enter all those settings again when you want to re-use this effect.
Once done, click OK.
It should look something like mine opposite.
4

You now have your basic Smooth metal panel. But done stop there, I added an Orb to mine, you can learn how to create this using my LCD ORB tutorial found here. To make the orb appear as though it is inset into the metal panel simply do the following steps..
Place your ORB onto your metal IFace. Now create a new layer UNDERNEATH the layers containing your LCD ORB but ABOVE your smooth metal shape. Now you need to draw a Circle selection using the elliptical marquee tool.
Now you need to draw a selection so that its just a little bigger than your original ORB. To make this easier, place your mouse in the centre of your ORB. NOW HOLD SHIFT and ALT and drag your selection. It may take a few tried but use my image opposite to guide you. Once you have your selection, select your gradient tool. Now Use these settings: gradient black-white linear. Drag from top to bottom over your selection so it begins to look inset. When done press CTRL + D to deselect.
5

I slightly gaussian blurred (Filter>Blur>gaussian Blur) my gradient ring by 0.5 just to make it smoother. It should hopefully look something like mine opposite now. It is ready for you to decorate how you wish.
6

I hope that answered your questions on how to create the metal iface look. Don't stop there, keep on adding to your iface and be sure to post any interesting creations in the forum, Thanks.
Hope you enjoyed the tutorial.
Hope you enjoyed the tutorial.
This tutorial was brought to you by Robouk, please post any questions in the forum. Thank you.