Dark Rust
Decorate those ifaces with some heavy rust texture...
1

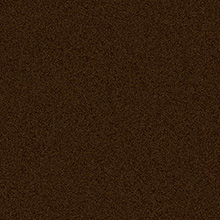
OK, here is the tutorial everyone keeps on requesting. Start with a new image about 500x500 pixels with a black background. Firstly, create a new layer and fill the whole image on that layer in with this colour brown.
R: 50 G:27 B:0
You should be left with something similar to the left.
R: 50 G:27 B:0
You should be left with something similar to the left.
2
OK now go to Filter>Noise>Add Noise enter 10 for amount and tick the uniform and monochromatic boxes as shown in the picture opposite.
3
Now Press D then X on the keyboard to reset the colours. Create a New layer, then using the gradient from foreground to background, drag from the middle of the image to the right end of the image. Set that layer to "colour Burn" Then lower the opacity down to about 37.
4

We almost have it except we need to add a few touches to the images to make it more realistic, firstly create a new layer and using the airbrush and a fat blurry brush (about size 60). Once you have the airbrush selected in the options turn the pressure down to about 14. With black set as your foreground colour, paint some dabs on the image and set the current layer with the dabs on to layer blend mode "colour Burn"and turn the opacity down to about 25. Also try using the colour red and paintings some dabs for a rustier effect.
5

You can also lighten some areas up with a large brush about size 260 and very blurry and then just lower the opacity, make sure you do it on a new layer though. When done just add some noise Filter>Noise>Add Noise.
Now when your happy, just go to Layer>Flatten Image and go to Select>All then Edit Copy then Edit>Paste and click on the background layer and fill it with black, now click on the rusty image layer and go to.....
Now when your happy, just go to Layer>Flatten Image and go to Select>All then Edit Copy then Edit>Paste and click on the background layer and fill it with black, now click on the rusty image layer and go to.....
6

Edit>Transform>Scale and enter 70 percent for width and height. Now hold CTRL and click on the rust layer, create a new layer and fill the selection in white, then press D then X and go to Filter>Filter Gallery>Brushstrokes>Spatter Enter Spray Radius 15 and smoothness 5 then using the magic wand, click anywhere in the white area of the image and so it selects just the white then hit delete don't deselect. Now click on the rust layer Go to Select>Inverse and hit delete. You can now delete layer 2 and you should have some nice eroded edges on your rust.
7

Just add whatever effects you want, I just embossed mine a little , you may want to lighten it up a bit and your done, you have your lovely dark and dirty rust.
This tutorial was brought to you by Robouk, please post any questions in the forum. Thank you.