Clear plastic tabs
An updated version of the old tutorial, even easier and quicker to follow...
1

Variations of this button have been floating around for years and its still proves very popular.
I decided to re-write my tutorial on it, which is much easier to follow.
Make a new image sized 600x600px with a white background.
Select the Rounded rectangle shape tool. Press D then X on the keyboard to reset your colours.
At the top of your screen match your options: rounded rectangle, width 98px, height 28px, radius 3px, animalised.
Now click once in the centre of your image, you are going to draw a WHITE button on your WHITE background so you wont be able to see anything.
You will only see the shape briefly as you click. Done? move on.
2
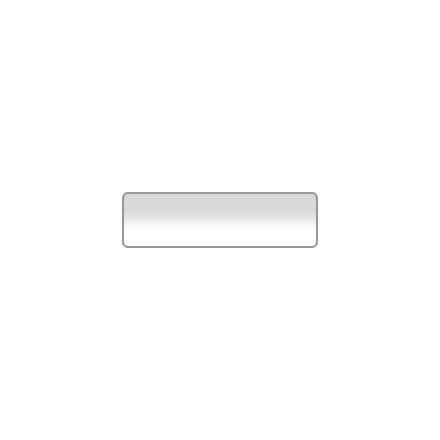
Ok, at the moment our button is invisible, so lets make it show up.
Go to Layer>Layer Style>Stroke.
Now simple match these settings: Size 1, position inside, blend mode normal, opacity 62, colour 585858.
Now add a Gradient Overlay to your button with these settings: opacity 15, black to white gradient (reversed), scale 39%, angle 90.
Do not Click OK just yet, it should now look like mine opposite.
3
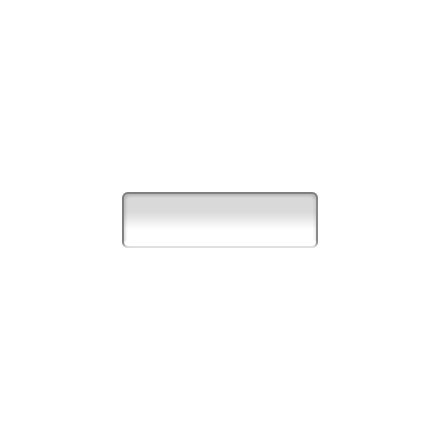
Now add a Bevel and Emboss layer style with the following settings: style: inner bevel, technique: smooth, depth:1000, size: 2, soften: 3. Angle: -84, altitude: 34, highlight mode opacity 75 - mode screen - colour white, shadow mode opacity: 16 - mode multiply - colour black.
If it looks like mine opposite, move on:
If it looks like mine opposite, move on:
4
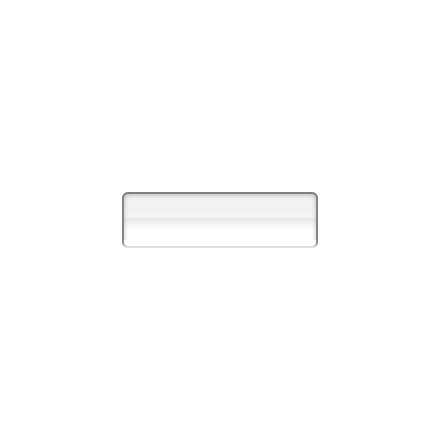
Nearly done now. Add an Inner Shadow layer style with these settings: colour: FFFFFF, opcaity: 65, angle: -90, distance: 13, choke: 0, size: 0.
5
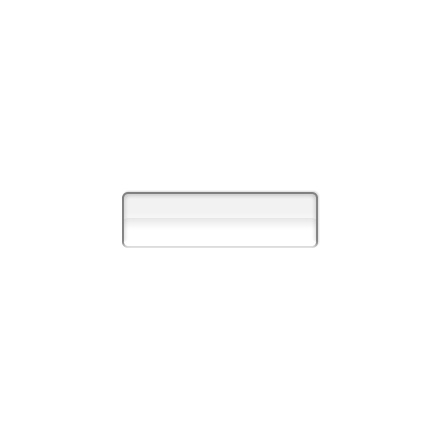
Last but not least we need to give our button a shadow so add a drop shadow with the following settings: blend mode: multiply #000000, opacity 14, angle: -134, distance: 1, spread: 0, size: 1.
Now, you are done with the button but don't forget to save your style for later use. Click "styles" at the top of the layer styles palette and click "New style" and give your style a name.
Now, you are done with the button but don't forget to save your style for later use. Click "styles" at the top of the layer styles palette and click "New style" and give your style a name.
6

Now just add some text to your buttons and your ready to go.
I find Font Arial at size 12pts works well. I also added a slight drop shadow to my text using the layer styles.
Hope you enjoyed the tutorial, you can show us any interesting creations you come up with in the Forum.
I find Font Arial at size 12pts works well. I also added a slight drop shadow to my text using the layer styles.
Hope you enjoyed the tutorial, you can show us any interesting creations you come up with in the Forum.
This tutorial was brought to you by Robouk, please post any questions in the forum. Thank you.