Gradient Menubar
Create a simple clean menu bar using basic gradients and lines...
1

Create a new rounded rectangle and fill it with your desired colour, I used R:138 G:92 B:206.
Next go to Layer > Layer style > Bevel and emboss, match the settings as follows: Highlight - Mode Screen, Opacity 79, Shadow - Mode Multiply, Opacity 59, Style Inner Bevel, Angle 120, Depth 4, Blur 0. Now hold CTRL and click on "layer 1" to select the shape.
2
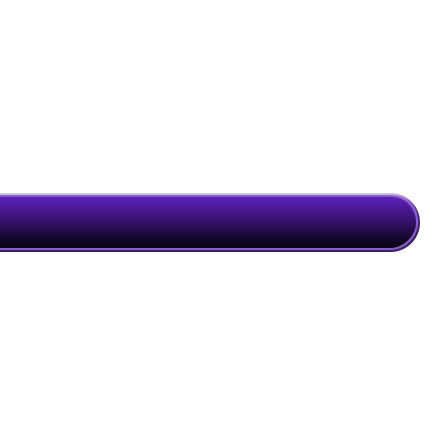
Create a new shape layer slightly smaller than the first one. Now using the colour R:101 G:34 B:200 as your foreground colour and black as your background colour, use the GRADIENT tool (foreground to background), add a gradient from the top of the bar to the bottom of your shape. You should get something like what I have opposite.
3

Now to create those inset lines,press D then X to reset the colours now using the square shape tool create a new shape and draw a horizontal white line from top to bottom (hold shift to make sure it goes Straight). Now set that layer blend mode to "soft light", next create a new shape layer and this time exactly next to the other line (to the right) draw a black line, it will look something like the pic opposite. Keep doing this (each line on a new layer) so that its equally divided your menu bar up. Then you can add your text.
3
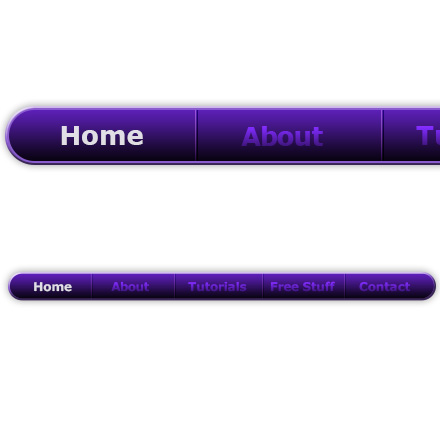
Try this, once you add your text set the text layer to blend mode overlay for a nice cool effect. Hope all was well for you! :) You can also go to Edit>Transform>Perspective and add some cool perspective to your circle of dots.
This tutorial was brought to you by Robouk, please post any questions in the forum. Thank you.