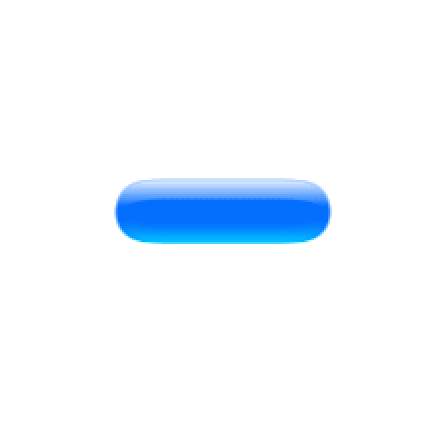
Gel button
Create a nice clear blue gel pill shaped button...
1
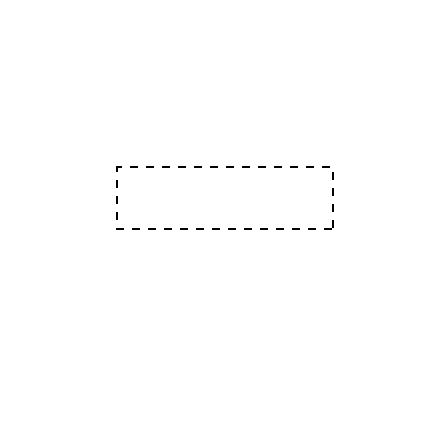
Create a new image 400x400 px with a white background. Now with the rectangle Marquee draw your rectangle to roughly the same size as mine. Switch to channels palette and fill your selection in with white. Now deselect the rectangle (CTRL+D).
2
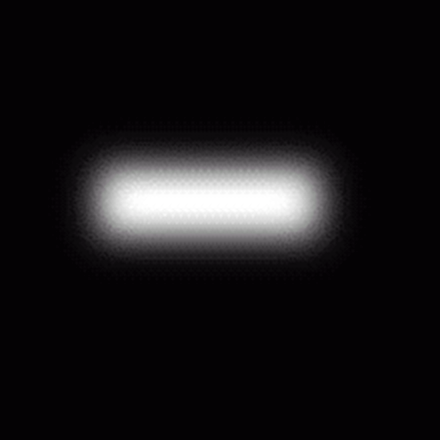
Goto Filter> Blur >Gaussian blur and blur to a radius of about 9.2 then click ok.
Now goto Image>adjust>levels and drag the two triangles to the center so you get a smooth pill shape. (see picture 4) click ok.
Now goto Image>adjust>levels and drag the two triangles to the center so you get a smooth pill shape. (see picture 4) click ok.
3
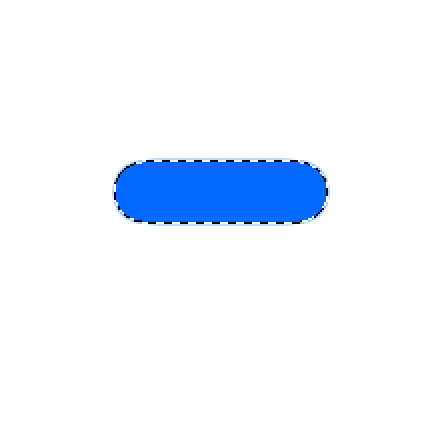
Now hold CTRL and click on "Alpha 1" now go back to the layers palette, Create a new layer by pressing and fill the selection in with
R:0
G:108
B:255
now you have your blue pill shape.
4

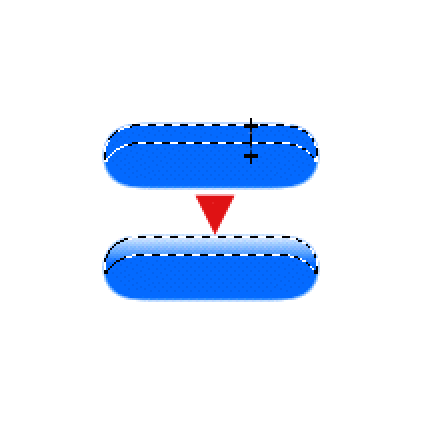
Now holding down SHIFT and with the marquee tool selected in the tool bar,push the up arrow on your keyboard once, to move the selection up. NowHOLD CTRL and ALT and click on "layer 1". you will get something similar to the picture opposite.
5

Now holding shift again press the down arrow on your keyboard once to move the selection back down. Now create a new layer (layer 2). Press D then X to reset the colors and select the gradient tool. Then in the options set it to "foreground to transparent" as shown.
6
Now drag the gradient from the top of the selection to the bottom as shown opposite.
7
OK deselect CTRL+D. Now duplicate the current (drag and drop it onto the )layer and goto Edit>Transform> Rotate 180. Now move the white highlight to the bottom of the pill shape as shown. Set the layer blend mode to "color Dodge" and turn the opacity of "layer 2 copy" down to 62. Now click on "layer 2 copy" and goto Filter> Blur> Gaussian Blur and enter a radius of 1.6 pixels. Click ok.
8
Hold ctrl and click "layer 1 to select it" now create a new layer. Now create a new brush (double click on a current brush in the brushes pallet to edit its settings) with the settings shown opposite. And add a small highlight to the bottom of the pill. Now turn the opacity of "layer 3" down until your button looks good and realistic.
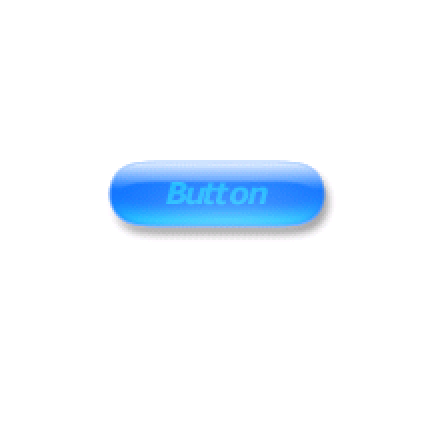
Now click "layer 1" and goto Layer>Effects>Drop Shadow and add a nice shadow. When you add your text to the button set the text layer to blend mode "overlay" for a cool effect (see pic) and that's it. Hope it looks good :)
Now click "layer 1" and goto Layer>Effects>Drop Shadow and add a nice shadow. When you add your text to the button set the text layer to blend mode "overlay" for a cool effect (see pic) and that's it. Hope it looks good :)
This tutorial was brought to you by Robouk, please post any questions in the forum. Thank you.