Digital Eye
One of the hardest things to digitally paint, heres a walkthrough tutorial...
1
Quick note, click images to view it in a larger size, you'll need to do this to see extra detail.
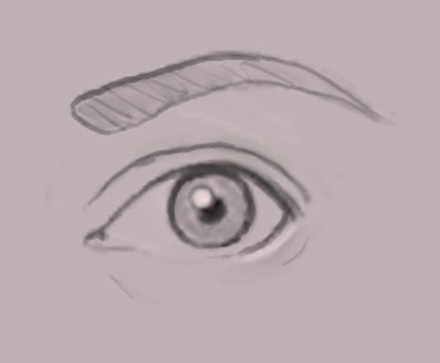
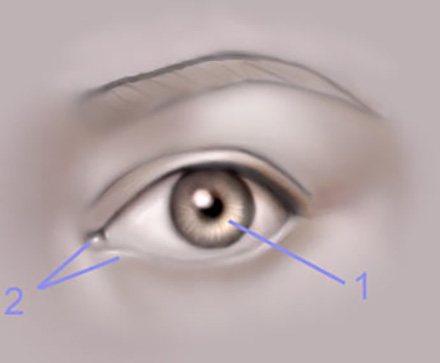
Start with a basic sketch of the eye. Notice how the lines droops down on the left and flares slightly upwards at the bottom to reveal the tear duct. I've noticed that many people forget to draw tear ducts on their eyes. Keep in mind that eyes vary a LOT from person to person. This eye is based off of my own. I think my eyes are rounder than average.
Start with a basic sketch of the eye. Notice how the lines droops down on the left and flares slightly upwards at the bottom to reveal the tear duct. I've noticed that many people forget to draw tear ducts on their eyes. Keep in mind that eyes vary a LOT from person to person. This eye is based off of my own. I think my eyes are rounder than average.
1b
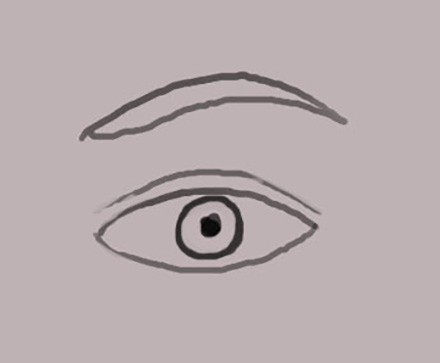
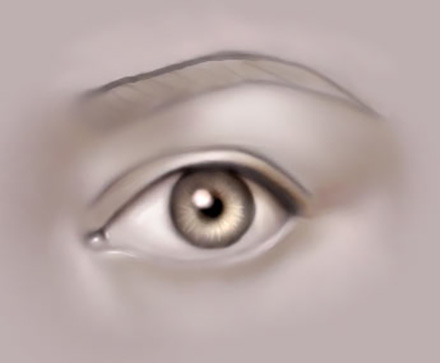
Left is an example of how not to draw an eye. *grin* I see eyes like the one below all the time. Lots of people have a tendency to draw the iris small and in the centre of the eyeball, not touching either the upper or lower eyelids. Almost any time you see a relaxed eye, part of the iris will be concealed... unless the person has naturally bugged out eyes like me. *grin* Another problem with the drawing below is that the lines of the eyelid are overly defined. There is no sense of form because there are no varying line widths. This drawing doesn't show the subtle contours of the tear ducts and the folds in the lid.
2
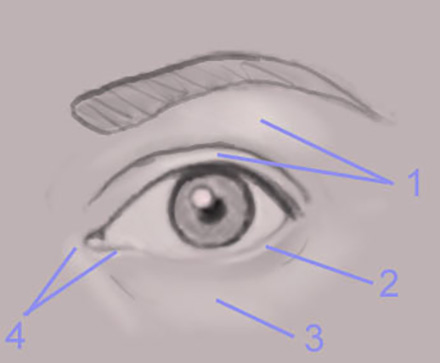
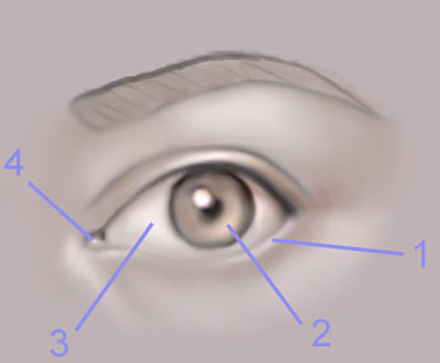
Here I've started to develop the highlights. I pointed out specific areas which I think are important. Area number two is often neglected. It shows the highlight along the inner rim of the bottom lid. Your eyelids are not flat, they are thick folds of flesh that wrap around the eyeball. Look in the mirror at your own eye to see what I mean.
3
Start putting in shadows. A nice balance between light and shadow is important to make areas *pop*. :) Area 1 is pretty important... lots of people forget to shade the eyeball itself and leave it stark white. Remember that its called an eyeBALL for a reason. *grin*
4
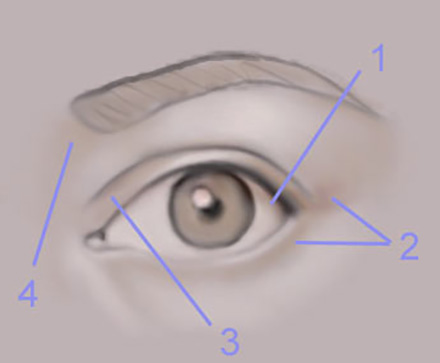
With a finer brush, add bolder highlights in specific areas. You'll notice things are getting a bit more crisp now. Notice that on section 2 the highlighted part of the iris is opposite the bright white highlight. This is how I usually draw it. I've heard that the eye almost always highlights this way - but don't quote me on that ;) And the same as the step above, you want to add light to the eyeball itself to make it appear round.
5

Deepen the shadows along the lash line. I've always darkened the pupil as well as the rim around the iris. Often I notice that eyes are dark around the edges and in the centre, then they sort of fade into the centre where the highlight gets bold and the colour of the eye is more evident.
6
Last step! I added some "spokes" to the centre of the eye to make it more realistic. I also added a bright highlight to the tear duct. Remember that this is a wet surface we're dealing with, so parts of your eye appear glossy.
7
Done! :D
This tutorial was brought to you by Robouk, please post any questions in the forum. Thank you.