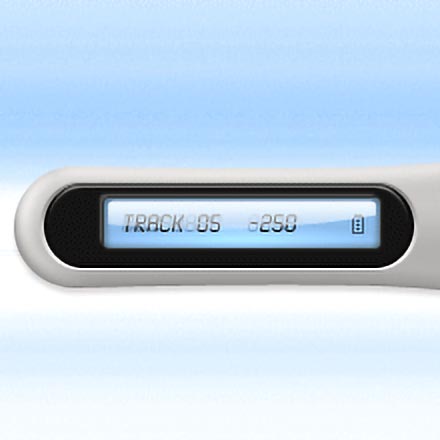
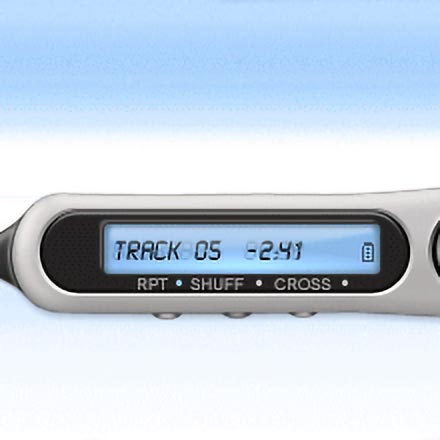
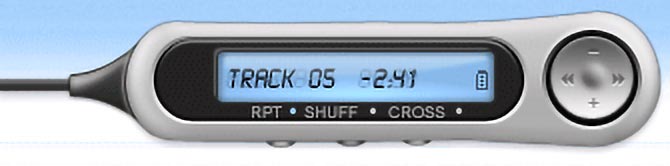
Audio interface
Learn some key techniques in creating interface elements in this two part tutorial...
4
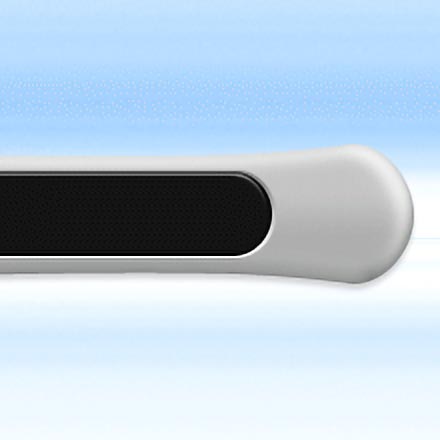
Now we are going to use what we learnt in the Inset button tutorial by making our screen look inset.
Using the rounded rectangle again with the same options as before: Only this time, use WHITE as your foreground colour.
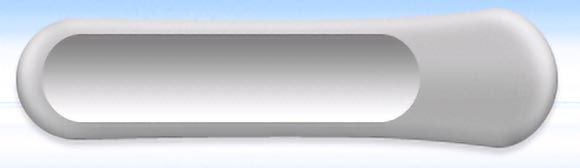
Create a new layer and draw another smaller pill shape over the top of your interface shape so it looks like mine Below. Go to Layer>Layer style>Gradient overlay and use these settings: Blend mode normal, opacity 49, colour- gradient (white-black), angle 90, style linear, angle 90, scale 93. Click ok.
It should now look something like mine below:
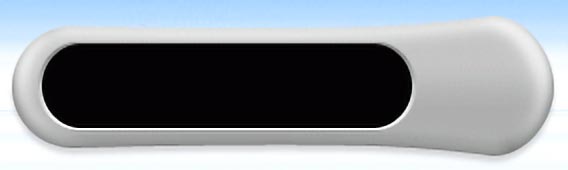
Next we need another black pill shape slightly smaller than the one we just drew. here's how to get it:
Duplicate the layer with the gradient pill on it that we just created by dragging it to the "create new layer" icon.
right click on your newly duplicated layer and choose "Clear layer styles" Now click on the layer to make SURE that its active and press D then X (to reset colours) and now hit CTRL+Backspace to fill the new shape in BLACK.
Now we need to make this shape slightly smaller. Press CTRL +T to transform the shape.
Hole ALT and drag the bottom side up slightly (holding alt mirrors anything done to the bottom side onto the top side so it remains equal. Now do the same with the right hand Side. Once your happy with it, Hit ENter to commit it or ESC to cancel and try again.
If all went well, it should look something like this:
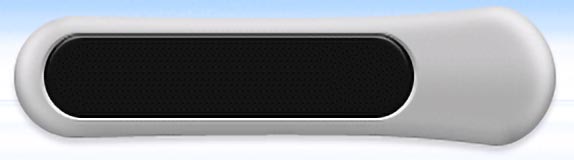
Now the black part is meant to be plastic, but where is the shine? Its in a layer style of course.
go to Layer>Layer style> Bevel and emboss and use these settings: Style inner bevel, technique smooth, depth 1, direction up, size 1, soften 0, angle 90, altitude 80, highlight mode screen, opacity 47, colour white, shadow mode multiply, opacity 75, colour black. Now add a contour layer style with these settings: Range 100, anti-aliased. And lastly, you might want to add an inner glow: Blend mode normal, opacity 96, noise 0, colour black, technique softer, source edge, choke 20, size 3. Again, you might want to save this style before you click OK.
It should now look like this:
Using the rounded rectangle again with the same options as before: Only this time, use WHITE as your foreground colour.
Create a new layer and draw another smaller pill shape over the top of your interface shape so it looks like mine Below. Go to Layer>Layer style>Gradient overlay and use these settings: Blend mode normal, opacity 49, colour- gradient (white-black), angle 90, style linear, angle 90, scale 93. Click ok.
It should now look something like mine below:
Next we need another black pill shape slightly smaller than the one we just drew. here's how to get it:
Duplicate the layer with the gradient pill on it that we just created by dragging it to the "create new layer" icon.
right click on your newly duplicated layer and choose "Clear layer styles" Now click on the layer to make SURE that its active and press D then X (to reset colours) and now hit CTRL+Backspace to fill the new shape in BLACK.
Now we need to make this shape slightly smaller. Press CTRL +T to transform the shape.
Hole ALT and drag the bottom side up slightly (holding alt mirrors anything done to the bottom side onto the top side so it remains equal. Now do the same with the right hand Side. Once your happy with it, Hit ENter to commit it or ESC to cancel and try again.
If all went well, it should look something like this:
Now the black part is meant to be plastic, but where is the shine? Its in a layer style of course.
go to Layer>Layer style> Bevel and emboss and use these settings: Style inner bevel, technique smooth, depth 1, direction up, size 1, soften 0, angle 90, altitude 80, highlight mode screen, opacity 47, colour white, shadow mode multiply, opacity 75, colour black. Now add a contour layer style with these settings: Range 100, anti-aliased. And lastly, you might want to add an inner glow: Blend mode normal, opacity 96, noise 0, colour black, technique softer, source edge, choke 20, size 3. Again, you might want to save this style before you click OK.
It should now look like this:
5
Lets now add the actually LCD screen to our black plastic pill.
Again, I'm going to be using similar techniques as before.
Since I'm creating a skin, I'm going to add a shiny glass/plastic looking LCD rather than the type you have on your audio player normally, but you can do it how you want. =)
Create a new layer, and select #86B7E7 as your foreground colour.
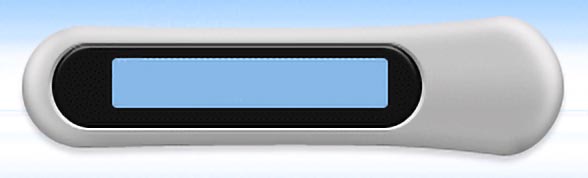
Using the rounded rectangle with the following options, draw your LCD screen onto your black part like shown below.
Options:rounded rectangle, radius 3, colour blue.
And it will look like this:
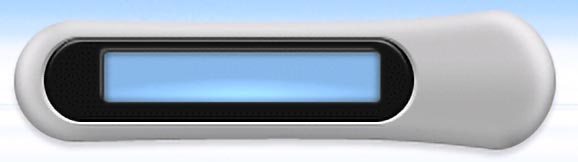
Now its not looking like a screen to me, so we are going to add some layer styles (yes again!) ;P
Go to Layer>Layer style>Drop shadow and use these settings: Blend mode multiply, colour white, opacity 30, angle -56, distance 3, spread 0, size 1.
Now add an Inner glow with the following settings: Blend mode normal, opacity 41, noise 0, colour black, technique softer, source edge, choke 0, size 5.
Next a Bevel and Emboss layer style: Style inner bevel, technique smooth, depth 211, direction up, size 92, soften 0, angle -90, altitude 45, highlight mode colour dodge, opacity 30, colour white, shadow mode colour dodge, opacity 0.
And lastly a Stroke Layer style: Size 1, position inside, blend mode normal, opacity 100, colour black.
When you done Click ok and it should look like mine below:
Now, the next part is optional, but to make it more realistic I usually add a highlight to it as if light it reflecting from it. Here's how:
This can get a little tricky, and whilst there are a few easier ways of getting a similar effect, this way is more realistic.
Follow carefully.
Duplicate the layer with your blue LCD screen on by dragging it onto the "create new layer" icon.
Right click this new layer and choose "Clear layer style".
Press X then D on the keyboard to reset your colours. Now hit CTRL + backspace to fill this shape in WHITE.
With the direct selection tool: click the now white shape. now Press CTRL + T to transform this shape.
In the options bar at the top, enter these setting width 97, height 87.
And hit Enter on the keyboard to commit it.
It should now look like this:
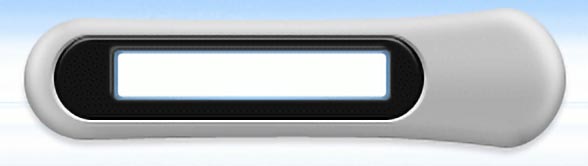
It does? great =)
Lower the fill opacity (in the layers palette) to 0% so its invisible :
Now, press D then X to reset your colours.
Go to Layer>Layer style>Gradient overlay and use these settings: Blend mode normal, opacity 100, colour- gradient (transparent-white), angle 90, style linear, scale 123. Then Click ok. You should have a good looking highlight now, but its a little too perfect.
In the layers palette, add a layer mask to your screen highlight layer by pressing the Add layer mask icon.
Now select the Pen tool. (make sure you have the correct one)
In the options bar, set the options to these: subtract from selection.
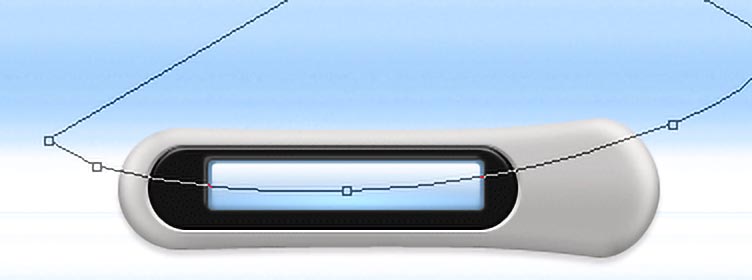
Now, on your canvas, draw a path that will contain all parts of the highlight you want to keep (see image below)
Now right click INSIDE the path and choose "Make selection" (you should still have the pen tool as your active tool) Leave all settings as default and click OK in the dialogue that pops up.
Press X then D to reset your colours (if needed) and hit CTRL + Backspace on the keyboard.
Press CTRL + D to deselect...
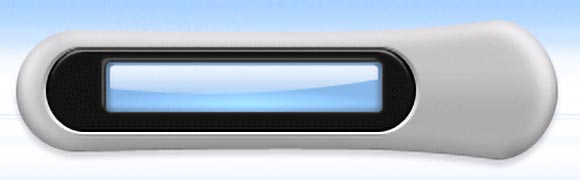
It should look like this:
We are now done with the LCD screen, just add your text to it.
Again, I'm going to be using similar techniques as before.
Since I'm creating a skin, I'm going to add a shiny glass/plastic looking LCD rather than the type you have on your audio player normally, but you can do it how you want. =)
Create a new layer, and select #86B7E7 as your foreground colour.
Using the rounded rectangle with the following options, draw your LCD screen onto your black part like shown below.
Options:rounded rectangle, radius 3, colour blue.
And it will look like this:
Now its not looking like a screen to me, so we are going to add some layer styles (yes again!) ;P
Go to Layer>Layer style>Drop shadow and use these settings: Blend mode multiply, colour white, opacity 30, angle -56, distance 3, spread 0, size 1.
Now add an Inner glow with the following settings: Blend mode normal, opacity 41, noise 0, colour black, technique softer, source edge, choke 0, size 5.
Next a Bevel and Emboss layer style: Style inner bevel, technique smooth, depth 211, direction up, size 92, soften 0, angle -90, altitude 45, highlight mode colour dodge, opacity 30, colour white, shadow mode colour dodge, opacity 0.
And lastly a Stroke Layer style: Size 1, position inside, blend mode normal, opacity 100, colour black.
When you done Click ok and it should look like mine below:
Now, the next part is optional, but to make it more realistic I usually add a highlight to it as if light it reflecting from it. Here's how:
This can get a little tricky, and whilst there are a few easier ways of getting a similar effect, this way is more realistic.
Follow carefully.
Duplicate the layer with your blue LCD screen on by dragging it onto the "create new layer" icon.
Right click this new layer and choose "Clear layer style".
Press X then D on the keyboard to reset your colours. Now hit CTRL + backspace to fill this shape in WHITE.
With the direct selection tool: click the now white shape. now Press CTRL + T to transform this shape.
In the options bar at the top, enter these setting width 97, height 87.
And hit Enter on the keyboard to commit it.
It should now look like this:
It does? great =)
Lower the fill opacity (in the layers palette) to 0% so its invisible :
Now, press D then X to reset your colours.
Go to Layer>Layer style>Gradient overlay and use these settings: Blend mode normal, opacity 100, colour- gradient (transparent-white), angle 90, style linear, scale 123. Then Click ok. You should have a good looking highlight now, but its a little too perfect.
In the layers palette, add a layer mask to your screen highlight layer by pressing the Add layer mask icon.
Now select the Pen tool. (make sure you have the correct one)
In the options bar, set the options to these: subtract from selection.
Now, on your canvas, draw a path that will contain all parts of the highlight you want to keep (see image below)
Now right click INSIDE the path and choose "Make selection" (you should still have the pen tool as your active tool) Leave all settings as default and click OK in the dialogue that pops up.
Press X then D to reset your colours (if needed) and hit CTRL + Backspace on the keyboard.
Press CTRL + D to deselect...
It should look like this:
We are now done with the LCD screen, just add your text to it.
6
Now you will want to add your buttons. Again, try to create as much of your buttons with layer styles.
I'm not going to cover adding buttons in this tutorial but look out for interface button tutorials coming soon. =)
I hope you enjoyed the tutorial and learnt something new.
See what you can come up with:
Don't forget to post any interesting creations in the forum for feedback
I'm not going to cover adding buttons in this tutorial but look out for interface button tutorials coming soon. =)
I hope you enjoyed the tutorial and learnt something new.
See what you can come up with:
Don't forget to post any interesting creations in the forum for feedback
This tutorial was brought to you by Robouk, please post any questions in the forum. Thank you.